|
Fitting – Comparing Measurement
|   |
Before the Fitting Begins:
Fitting: Comparing Measurement sub-tab
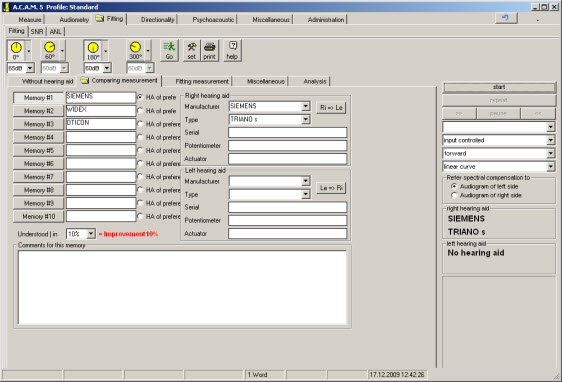
The display for the Fitting Comparing measurement tab is shown below in Figure 175.
This tab is designated for the actual hearing instrument fitting.
The data within this tab are integrated into the "evaluation," the "fitting report," and the "special documentation" sections.

Figure 175: The user tab Comparing measurement
Memories within the Comparing measurement tab (Figure 175)
Left hearing aid/Right hearing aid options (Figure 175):
Information such as manufacturer, type, and other information can be entered. The fields manufacturer and type are self learning. Information entered here is saved independently from the patient information. This information can always be accessed for editing purposes.
The measurement Comparing measurement begins by clicking <go>.
Table of <go> functions:
|
|
|
Fitting Report:
Information pertaining to each memory within the comparing measurement tab is integrated into the fitting report and into the special documentation section.
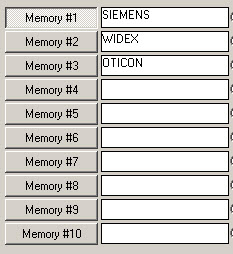
The field to the right of the <memory> button is used to type in the names or titles of each memory (Figure 176). This information is not transferred to the reports or special documentation section.

Figure 176: Image of ten memory slots within the Comparing measurement tab.
Selection of the favorite instrument:
Table of selections to identify the patient's favorite instrument:
|
|
Selection of <Best Device>. This information as well as the hearing aid details are transferred to the fitting report and the special documentation section. |
|
|
The percentage documented in the understood (in %) field corresponds to the measurement without hearing aid tab. |
Important Advice:
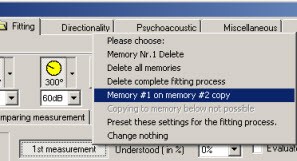
A special menu is available by right clicking the mouse over <memory #1>, <memory #2>, <memory #3>, etc. (Figure 177).

Figure 177: Menu available following a right click of <memory #>.
The special functions menu has a series of options. Please refer to Figure for further information regarding special functions.
Special importance of the fitting memories in a bilateral Fitting:
When you have performed your selection of the hearing instruments and fitting it is required that you repeat the measurement with one instrument.
Enter the favorite instrument into a free memory (or copy the memory) and delete the fields on the right side.
Perform a discrimination test and repeat this procedure for the other ear.
Apply the monaural measurements to the right and to the left ears.